Saturday 19 July 2014

Colourful Wreath with Little Balls of Fabric

While making my first rag quilt, I kept all the of the scraps. I didn't want to throw away any leftover fabric just in case I could use them for a future project. I searched online for some ideas and I saw you could make little balls of fabric using your scraps. I had some embroidery thread I wanted to use up so I decided to go with making some fabric balls.

I rolled up my flannel scraps into balls about an inch in diameter. I inserted my needle just under where the fabric ended to hide the knot and started wrapping the thread around the ball by weaving through the fabric. Once I had wrapped enough thread around the ball, I inserted the needle completely through the ball to the other side and the stitched a couple back stitches to secure the thread.

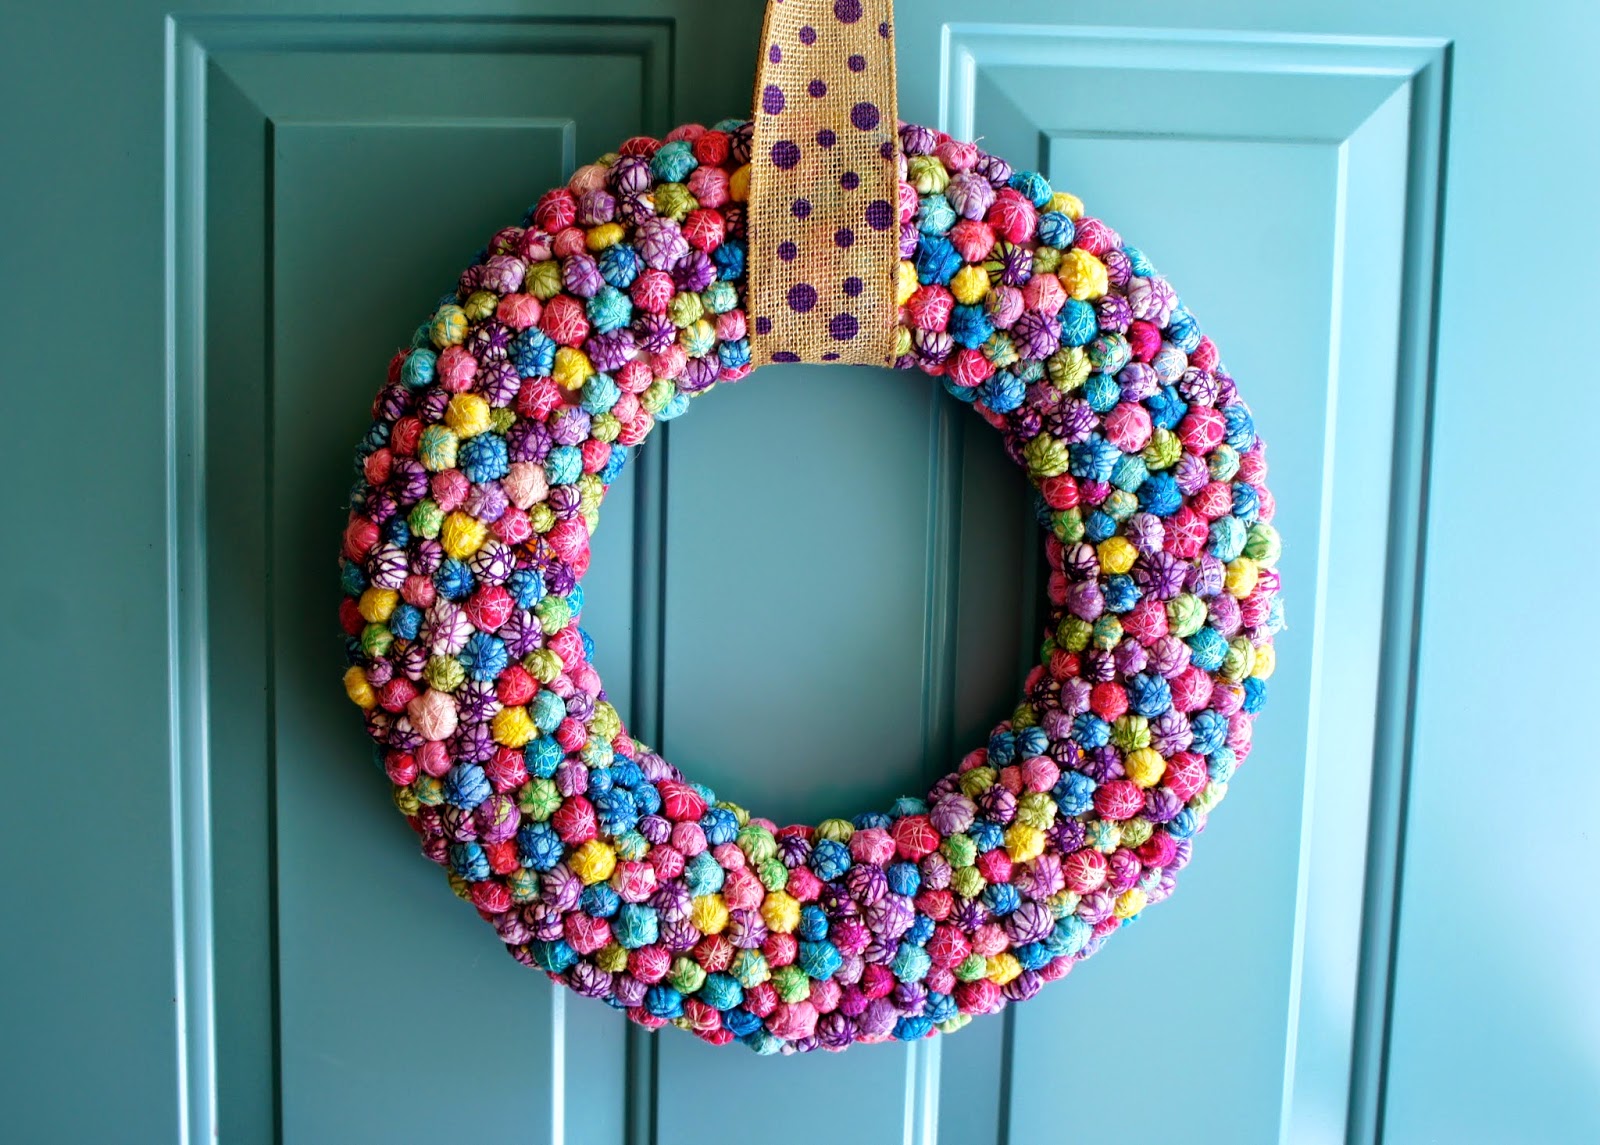
As I was making these balls, I wasn't sure what I was going to do with them. I could make a necklace or a mobile, or just display them in a glass vase. I kept the little balls for a few years and finally I decided to make a wreath.

When my husband and I were renovating our kitchen, I asked our wonderful handyman to cut out a few circles from plywood that I could use as a frame for a wreath. I used one for this wreath. 

I cut out long strips of flannel and washed the strips to give them a ragged effect. I placed a layer of batting on the front side of the frame and then wrapped the frame with the fabric strips. I pinned the flower to the wreath and then I then glued all the balls onto the wreath using hot glue. Once I finished securing all of the balls, I glued the knitted flower. I had tried knitting a few flowers for fun and this one matched so I decided to use it. The light pink flower on top of the knitted flower is actually a hair piece, but I had bought it to use as a decoration in a wreath one day. Since it had a clip, I just clipped it to the knitted flower. I think the two flowers make a pretty combination and match perfectly with the fabric balls.


Tuesday 15 July 2014

Starfish Pillow

I was inspired to make this Starfish pillow when I saw the Heart Wall Hanging project in the book "Inspirational Ideas - 200 Easy-To-Make Pretty Gifts For The Home". The wall hanging used the same fabric that I already had in my stash, so instead of hearts which were appliquéd on each square, I thought Starfish would be fun. Plus, I wanted to use up my embroidery thread. 

I searched online for a drawing of a starfish and found one I liked. I traced each starfish on a large piece of fabric so I could secure it in the embroidery hoop. Once I embroidered all the starfish, I cut out the blocks and sewed them together. Initially I was going to make a wall hanging, but decided to make a decorative pillow with piping and an envelope closure.


I chose to use the backstitch for the outline of the starfish and french knots for the spine (I am not sure if the small dots represent the spine or the skin).


Below is the starfish drawing I found online.


Saturday 31 May 2014

Hand-stitched Napkins

I bought this fabric planning to make cloth napkins using my sewing machine, but when I saw the hand-stitched napkins from the Purl Bee, I changed my mind. I like projects that I take with me while I am commuting or travelling, which I was able to do with this project. I loved the effect embroidery thread added to the napkin, which would not have been the same using a sewing machine. In addition, I had some random strands of embroidery thread which I was able to use up in this project.


Monday 19 May 2014

Apple Faces Felt Napkin Rings

When I was living in Montreal, I stumbled upon a cute, little yarn store. While I was inside browsing, I found these unique embroidery kits by Sublime Stitching. I had never seen patterns likes these before and on the packaging it read "This ain't your gramma's embroidery"! 

One package had a variety of fruit and funny faces. It was possible to mix and match the faces with the different fruit. For these napkin rings I used the apple fruit template along and all of the faces.

Here is how you can make them:

  1. Trace 2 apple templates per ring on a red piece of felt from the embroidery package by Sublime Stitching 
  2. Trace 1 small leaf per ring on a green piece of felt (I used a leaf template I found online, or you can draw one free hand)
  3. Trace 1 stem per ring on a brown piece of felt (I used a stem template I found online, or you can draw one free hand)
  4. Iron a face template cut out from the embroidery package by Sublime Stitching onto 1 of the 2 apples cut from the red felt
  5. Embroider the face with black embroider floss
  6. To make the apple more sturdy, cut out a piece of cardboard a bit smaller than the apple template and place it in the middle of the two felt apple pieces
  7. Sew a blanket stitch with red embroider floss to join the two apple pieces with the cardboard in the middle and to secure the leaf and steam
  8. To make the ring, cut out two pieces of cream coloured felt 1" by 6" and sew along both edges using the sewing machine
  9. Overlap the ends about 1 inch and glue them together with a glue gun
  10. Glue the apple on top of where you glued the ends together so it will be hidden


Sunday 30 March 2014

Striped Monkeys

For these monkeys I followed the pattern for the Striped Monkey in the book by Sue Havens called "Make Your Own Toys".

I used a sweater that was given to me from a colleague, scrap flannel and men’s dress shirts. I tried to use fabrics that had a striped pattern.

Body – Knitted sweater (for one I used fleece)
Head – Flannel
Ears, Arms and Tail – Men’s dress shirts, flannel and cotton
Face - Cotton
Patches – Flannel, fleece, cotton and men’s dress shirts
Eye Patch – White felt
Eyes - Black or dark blue buttons
Mouth and Nose – Embroidery thread

I used the sewing machine to stich the ears, arms and head. It is better to sew the knitted materials by hand, which I did for the body. I sewed the face on using a zigzag stitch and attached the ears while sewing the head.

I stuffed the moneys with stuffing an old pillow and some polyester batting.


These monkeys were a great way to use up old clothes. The patches and the tail give the moneys a finishing touch.